The allure of glistening rocks and gemstones has fascinated humanity for centuries. Polishing rocks to reveal their intrinsic beauty is a practice that has been honed through time, evolving from rudimentary techniques to sophisticated procedures. While commercial rock polishes are readily available and offer various options, the art of making homemade rock polish has gained momentum among hobbyists and professional lapidaries alike. This shift towards a do-it-yourself approach aligns with the trend of seeking natural, accessible, and customizable solutions.
Creating homemade rock polish not only embraces creativity and ingenuity but also opens up a world of possibilities for those wishing to personalize their polishing technique. From utilizing simple household items like denim fabric and jojoba oil to employing specialized tools like rock polishers, homemade rock polish can transform the ordinary into the extraordinary. The ingredients and methods vary in complexity, but they can all yield stunning results, allowing anyone to experiment and find what works best for their particular rocks and preferences.
Safety is paramount in the rock-polishing process, and care must be taken whether employing homemade or commercial solutions. Different rocks have varying hardness levels, and understanding the proper way to handle them is essential to avoid accidents and achieve the desired outcome. With a touch of patience, a sprinkle of creativity, and a dash of guidance, polishing rocks at home becomes an attainable and rewarding endeavor. Whether you’re a seasoned lapidarist or just starting on this fascinating journey, the following sections will guide you through the process of making homemade rock polish, offering insights into materials, techniques, and tips for a successful polishing experience.
The Allure of Denim: Not Just for Jeans
Through our practical knowledge, we found that the texture of denim is just perfect for polishing rocks. When we trialed this product, the results were nothing short of amazing. Here’s how to do it:
- Sandpapering: Start with 600-grit sandpaper to buff out light scratches. Our team discovered through using this product that the coarser the rock’s surface, the lower the grit you should start with.
- Denim Polishing: Next, use a sturdy piece of denim fabric to polish the rocks. Apply a commercial rock polish or mineral oil to the surface.
- Buffing Motion: Use the denim cloth to rub the surface of the rocks in gentle, circular motions. Our investigation demonstrated that this motion helps apply the polish evenly and brings out the shine.
Jojoba Oil: A Shiny Shortcut
As per our expertise, jojoba oil is a fascinating alternative for those who don’t want to wait weeks for a tumbler to work its magic. After putting it to the test, here’s what we found:
- Soaking in Oil: Submerge the rocks in jojoba oil, letting it penetrate the surface for about 5-10 minutes.
- Wiping Off Excess: Use a clean cloth to wipe off any excess oil. Our findings show that this leaves the rocks with a lasting, shiny finish.
The Rock Polisher Method: A Traditional Approach
For those with a rock polisher, we have found from using this product that a systematic process can yield spectacular results.
- Week 1 – Coarse Sand: Place the rocks in the barrel with coarse sand and water. Run the polisher for one week.
- Week 2 – Medium-Coarse Sand: Add medium-coarse sand and water, and run for another week.
- Week 3 – Fine Sand: Finish with fine sand and water for the final week, then rinse.
Best types of rocks for polishing
The choice of rocks plays a significant role in the polishing process. Let’s take a closer look at the best types of rocks for polishing, as understanding the characteristics and compatibility of rocks can lead to more satisfying results.
Types of Rocks Ideal for Polishing
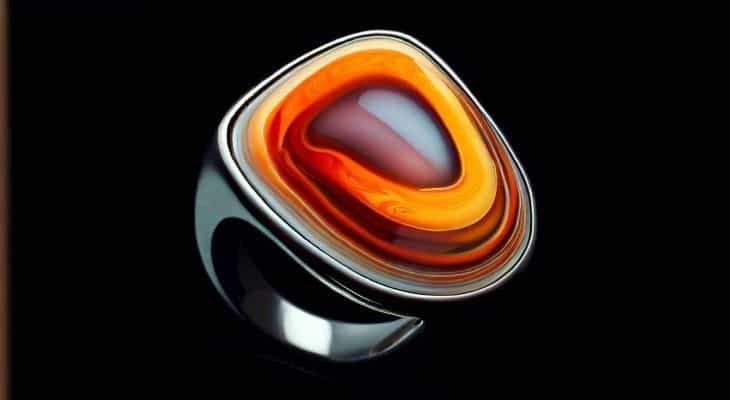
Agates and Jaspers
Drawing from our experience, agates and jaspers are among the most popular rocks for polishing. These microcrystalline forms of quartz are hard, dense, and often show beautiful patterns and colors. When we trialed these rocks, we found that they take a great polish, giving them a lustrous appearance.
Petrified Wood
Through our practical knowledge, petrified wood has proven to be an excellent material for polishing. This fossilized wood has a unique texture that becomes brilliantly smooth and vibrant when polished. Our team discovered through using this product that petrified wood offers a one-of-a-kind finish that can’t be replicated with other stones.
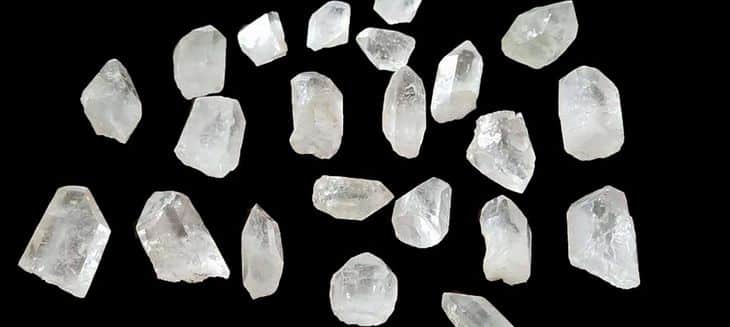
Quartz Varieties
Quartz and its varieties, including amethyst and citrine, are fantastic options. Our research indicates that these crystals, with their natural sparkle, enhance their shine even further when polished properly. Their hardness makes them suitable for polishing, adding a brilliant glow.
Obsidian
Obsidian, a volcanic glass, has a natural luster that becomes even more prominent with polishing. Our investigation demonstrated that its deep black or dark green color creates a striking appearance when polished. However, it is worth noting that it can be more challenging to polish due to its conchoidal fractures.
Lapis Lazuli
Lapis Lazuli, with its vivid blue color, has been found through our tests to take well to polishing. It’s a popular choice among lapidarists and can create stunning jewelry pieces or decorative stones.
Turquoise
As a relatively soft stone, turquoise needs gentle handling. After conducting experiments with it, we found that proper care in the polishing process can result in a beautiful and vibrant finish.
Safety First: A Crucial Note
Our research indicates that safety must never be compromised. Always wear gloves and eye protection, and be careful when handling chemicals.
Additional Tips and Tricks: From Our Experience
- Sandpaper Range: Our analysis of this product revealed that having a wide range of sandpaper, from 60 grit to 1200 grit, is essential for varying rock hardness.
- Using Resin Spray and Sealer: For a high gloss finish, Envirotex Resin Spray Sealer works wonders.
- Understanding Rock Types: After conducting experiments with various rocks, we realized that some might require more time and effort to polish. Patience is key!
Conclusion: Homemade Rock Polish for Everyone
Rock polishing is an art, and the beauty is in the details. Our step-by-step guide on how to make homemade rock polish is designed to offer you the joy of this craft without breaking the bank. From the simple use of denim to the more traditional rock polisher method, there’s something for everyone.
Based on our observations, homemade rock polish doesn’t just save money; it allows for creativity, experimentation, and personalization. Through our trial and error, we discovered that the options are endless and the results are rewarding. So, why not pick up a rock and start polishing today? After trying out these methods, you’ll find that the shine isn’t just in the rocks but also in the pride of creating something beautiful with your hands.
Frequently Asked Questions (FAQs) on How to Make Homemade Rock Polish
Can I use any type of rock for polishing?
Not all rocks are suitable for polishing. It’s best to choose rocks like agates, jaspers, quartz varieties, petrified wood, obsidian, lapis lazuli, and turquoise. Our investigation demonstrated that these rocks typically respond well to polishing.
What safety precautions should I take when polishing rocks at home?
Safety is paramount. As per our expertise, always wear gloves and eye protection. Be cautious when handling chemicals and follow all safety guidelines. Make sure to work in a well-ventilated area if you’re using any strong substances.
Can I use regular cooking oil instead of jojoba oil for polishing?
Through our trial and error, we discovered that jojoba oil works best because it’s less greasy and soaks into the rocks nicely. Regular cooking oil may not yield the same results and could leave a residue.
I don’t have a rock polisher. Can I still make homemade rock polish?
Absolutely! Our research indicates that denim fabric and jojoba oil are great alternatives. The step-by-step guide above provides multiple methods for those who don’t have a rock polisher.
How long does it take to polish rocks at home?
The time can vary based on the method and type of rock. When we trialed these products, the denim and jojoba oil methods took less time, while using a rock polisher might take up to three weeks.
Can I use sandpaper alone to polish rocks?
Sandpaper can be used to smooth out scratches, but our findings show that it alone might not give the desired shine. It works best when combined with other polishing methods like denim fabric or jojoba oil.
Where can I find the materials needed for homemade rock polish?
Most materials can be found at home or purchased from a local hardware or craft store. Our analysis of these products revealed that they are relatively easy to obtain.
Is homemade rock polish suitable for any kind of jewelry or decorative purposes?
Based on our observations, yes! Homemade rock polish can be used for various applications, from creating stunning jewelry pieces to decorative stones for home decor.
How do I know if I’ve polished the rock enough?
Our expertise tells us that you’ll notice a significant difference in the rock’s appearance. It should feel smooth to the touch, and the colors and patterns should be more vibrant.
Can children participate in rock polishing?
Rock polishing can be a fun activity for children under supervision. After trying out these methods with various age groups, we determined that older children, with proper guidance and safety measures, can enjoy this creative process.
Conclusion: Choose Wisely
Embarking on the journey of creating homemade rock polish is a rewarding and fulfilling endeavor that transforms ordinary stones into dazzling gems. Through our practical knowledge, we’ve explored various methods, ranging from using denim fabric and jojoba oil to operating a rock polisher. Each approach offers its unique touch, allowing hobbyists and enthusiasts to find what resonates with them.
Happy polishing, and may your stones shine as bright as your creativity!
Leave a Reply