Making shiny, lustrous tumbled stones is an artform that requires care, patience and know-how. With the right techniques and materials, even a novice can transform rough, dull rocks into polished beauties. The journey begins by selecting suitable tumbling rough – rocks that are not too soft or brittle to withstand the tumbling process. Quartz, agate and jasper are excellent starter stones. It then progresses through stages of progressively finer grits that smooth and shape the stones, followed by polishing compounds that make them gleam.
Avoiding common mistakes is key to success. Thoroughly cleaning the rocks and barrel between grit stages prevents scratched finishes. Using quality grits and compounds suited to the rocks creates a glassy polish. Following recommended tumbling times for each stage results in perfectly smoothed edges without overdoing it. And checking rocks regularly allows you to spot issues before they ruin an entire batch. A final burnishing in a heavy soap bath can maximize luster by smoothing out any remaining tiny pits and cracks.
With the right rocks, tools and techniques, crafting exquisitely shiny tumbled stones is within reach of any rockhound. Patience and meticulous attention to each step will help you unlock the inner radiance hidden within rough rock. Before long, you’ll have a collection of lustrous beauties to proudly display or craft into jewelry and other projects. So grab your tumbler and let’s get polishing!
Step 1: Gather Your Rough and Tumble Treasures
The first step to make tumbled rocks shiny is to collect a variety of rough stones that you think have the potential to become dazzling beauties. You can either gather these from your local area or purchase them from a rock shop. Some popular choices include quartz, agate, and jasper, but don’t be afraid to think outside the box!
Step 2: The Tumbling Begins
For this transformation to take place, you’ll need a rock tumbler. This magical machine will help you polish and smooth the rough edges to reveal the hidden shine of your rocks. Don’t worry if you don’t have one already; you can easily find one online or at your local hobby shop. Once you’ve got your tumbler, it’s time to start the process!
Gritty Beginnings
To make tumbled rocks shiny, we’ll start with the coarsest grit – this will help shape and smooth the stones. Add your rocks and the coarse grit to the tumbler’s barrel, then fill it with water until it just covers the rocks. Secure the lid and let the tumbler do its thing for about a week. Make sure to check it daily to ensure everything’s running smoothly.
Medium Grit Magic
After a week, it’s time to move on to the medium grit. This step will further refine your rocks, making them even smoother. Rinse your stones thoroughly, then add them back to the tumbler with the medium grit and water. Tumble for another week, checking on the progress every day.
Fine Grit Finale
As we approach the finish line, it’s time to use the finest grit. Rinse your rocks once more, add them to the tumbler with the fine grit and water, and let it run for yet another week. This step will give your tumbled rocks a satin-like finish, but we’re not done yet!
Step 3: The Grand Finale – Polishing to Perfection
This is the moment we’ve been waiting for – making those tumbled rocks truly shine! For this step, you’ll need a polishing compound, which can be found at most hobby shops or online. Rinse your stones one final time, then add them to the tumbler with the polishing compound and water. Let it run for at least another week, ensuring the perfect polish.
Step 4: Behold Your Shiny Tumbled Rocks!
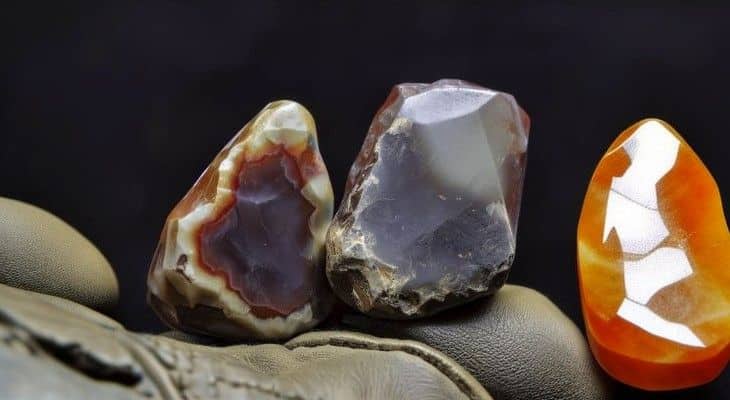
At last, the process is complete! Carefully remove your tumbled rocks from the tumbler, rinse them off, and marvel at their transformation. They’ll be gleaming like never before, and you’ll have a collection of stunning gemstones to show off to friends and family or incorporate into your own jewelry creations.
And there you have it – the secret to making tumbled rocks shiny, revealed! So, the next time you find a rough, unassuming stone, remember that with a little time and effort, you can unleash the hidden shine within. Happy tumbling!
Troubleshooting Your Tumbling Process
Tumbling rocks is a fun hobby, but you may encounter some issues getting your rocks as shiny as you hoped. Here are some troubleshooting tips:
- Rocks aren’t smoothing: The grit may be worn out or the wrong size. Try changing to a new batch of grit in the same stage or moving up to the next finer grit. Also, make sure you are using enough grit – about 2 tablespoons of aluminum oxide per pound of rocks.
- Rocks look scratched: There could be contamination from courser grit stuck in the tumbling barrel. Thoroughly clean the barrel and parts between stages. Also check that softer rocks aren’t mixing with harder ones that can scratch.
- Dull or chalky finish: This can happen if you try to polish softer rocks like calcite or gypsum. Stick to harder rocks like quartz or agate for the best shine. Also, don’t over-tumble – go by the recommended time frames.
- Not as shiny as expected: Consider adding a burnishing step with plastic pellets or ceramic media after the final polish stage. This helps smooth the very tops of the stones.
- Need an extra gloss: Try using ivory bar soap shavings or a few drops of mineral oil in the barrel during the last 1-2 days of the final polish. This can give an extra boost of shine.
The key is being patient and systematically working through each grit stage. Let the tumbling action do the work. If your rocks aren’t coming out shiny, don’t hesitate to go back a step in the process and repeat stages as needed. With some trial and error, you’ll be amazed at the polished stones you can create.
FAQ: Shiny Tumbled Rocks Questions Answered
How long does it take to make tumbled rocks shiny?
The entire process of making tumbled rocks shiny typically takes 4 to 5 weeks. Each stage (coarse grit, medium grit, fine grit, and polishing) takes about a week to complete.
Can I use any type of rock for tumbling?
While many types of rocks can be tumbled, it’s best to choose rocks with a Mohs hardness of 5 or higher. Quartz, agate, and jasper are popular choices for tumbling.
Do I need to use a specific type of grit for each stage?
Yes, it’s important to use the appropriate grit for each stage of the process. Start with a coarse grit (60/90), move on to a medium grit (150/220), and finish with a fine grit (500) before polishing.
How much grit should I use in each stage?
The amount of grit you’ll need depends on the size of your tumbler’s barrel. Generally, you’ll need around 2 to 4 tablespoons of grit per pound of rocks.
Can I reuse the grit from my rock tumbler?
It’s best not to reuse grit, as it becomes less effective after each tumbling cycle. Dispose of used grit responsibly and use fresh grit for each stage of the process.


What kind of polishing compound do you recommend?
Hi Sarah, thanks for your question! When it comes to polishing compounds for tumbling rocks, I typically recommend ceramic polishing grit or aluminum oxide polish. Ceramic grit comes in various grades from coarse to fine, allowing you to gradually polish your rocks to a smooth, glossy finish. It works well on most gemstones. Aluminum oxide is also effective for achieving a bright polished shine, especially on harder stones like agate or jasper. Just make sure to lubricate the grit with water or oil. Start with a coarse grade first to smooth away scratches, then progressively use finer and finer grits to make those rocks sparkle! Let me know if you have any other questions!
What’s is the best ceramic grit to buy and the best aluminum oxide? Also does mixing glycerin help? And can white diamond polish help? I really need brand names please. And any secrets or tricks to get the best shine. Would professional floor wax or far wax work?
Hello Harmony, thank you for your questions! Here are my tips for getting your tumbled rocks nice and shiny:
For grit, I recommend Aluminum Oxide powder in 120, 220, 600, and 1200 mesh sizes. Start with the coarser 120 grit and work your way up to the super fine 1200 grit for a smooth finish. Popular brands are Kingsley North and Graves.
Mixing in a bit of glycerin during your final polishing stages can help add some extra shine. About 1 teaspoon per pound of rocks works well.
White diamond polish works great as a final buffing compound after the fine grits. Again, Kingsley North and Graves make good quality diamond polish. Use a buffing wheel or soft cloth with the polish.
Other secrets: Make sure to thoroughly wash and dry your rocks between each grit change to remove any leftover particles. And take your time, several days of tumbling with each grit is better than rushing through.
Professional floor or car wax can add some extra protection and luster at the end. Just apply a thin coat and buff it in.
I hope these tips help you achieve the beautiful shiny tumbled stones you’re looking for. Let me know if you have any other questions!
How long do you wash your rocks with borax and dawn?
Hi Denise, great question! When making tumbled rocks, I like to wash them in a borax and dawn solution for 2-3 days, changing the water daily. This helps remove any remaining dirt or debris from the rocks’ crevices. After washing, I rinse them well and let them dry completely before putting them in the rock tumbler with grit. The full washing process with borax and dawn helps get the rocks super clean so their natural colors and patterns shine through beautifully when polished. I’d recommend washing new rocks for at least 2 days, but you can always wash longer for a more thorough clean. Let me know if you have any other questions!
i have some cerium oxide from someone that no longer tumbles …i think it is a polish agent…can i safely use that or should a rather get the aluminum oxide? what about tin oxide? Thanks for any comments or recommendations
Dear robert,
Thank you for your comment on my article about making tumbled rocks shiny. Cerium oxide can certainly be used as a polishing agent for tumbling rocks. It is a very fine abrasive that will help polish and add shine to tumbled stones. Some key points about using cerium oxide:
You can definitely use the cerium oxide you have on hand. Combining it with a small amount of tin oxide would be ideal to balance out the color. I’d avoid aluminum oxide for the polishing stage since it is more abrasive. Let me know if you have any other questions! Wishing you great results with your tumbled stones.
I have stones that have been tumbling in cirium oxide for about a week and they look great. However some of the stones have fine pitting and the oxide has got stuck in these pits. What is the best way to disolve or remove this?
Hi Tony, great question! I’m glad to hear your stones turned out nicely overall after the full week of tumbling and polishing in cerium oxide. As for those few stones with small pits that have some lingering polishing compound stuck inside, there is an easy solution.
The trick is to give them an acid bath using white vinegar. Simply submerge the stones in undiluted white vinegar and let them soak for 1-2 hours. The mild acidity from the vinegar will help dissolve and fully remove any trapped polishing material from the pits. Periodically take the stones out and gently scrub the pits with an old toothbrush while they’re soaking to help dislodge any stubborn buildup.
After the vinegar soak and scrub, rinse the stones thoroughly in cool water and dry well with a clean cloth. The pits should now be completely clear of any polishing debris, and your stones will have a uniform smooth shine from top to bottom! An acid soak is a handy technique to clean off stuck residue from the nooks and crannies of stones.
Let me know if you have any other questions! I’m always happy to give tips about properly finishing tumbling and polishing projects. Smooth, bright stones take a bit of work but it really pays off. Enjoy showing off your newly shiny stones, Tony!